How to Make an iOS App in Swift with ComPDFKit
This section will help you to quickly get started with ComPDFKit PDF SDK to make an iOS app in Swift with step-by-step instructions, which include the following steps:
- Create a new iOS project in Swift.
- Integrate ComPDFKit into your apps.
- Apply the license key.
- Display a PDF document.
Create a New iOS Project in Swift
In this guide, we use Xcode 12.4 to create a new iOS project.
Fire up Xcode, choose File -> New -> Project..., and then select iOS -> Single View Application. Click Next.

Choose the options for your new project. Please make sure to choose Swift as the programming language. Then, click Next.

Place the project to the location as desired. Then, click Create.
Integrate ComPDFKit into Your Apps
There are three ways to integrate ComPDFKit PDF SDK for iOS into your apps. You can choose what works best for you based on your requirements.
Adding the ComPDFKit CocoaPods Dependency
Open the terminal and go to the directory containing your Xcode project:
cd .../PDFViewer.Run
pod init. This will create a new Podfile next to your.xcodeprojfile:
Open the newly created Podfile in a text editor and add the ComPDFKit pod URL:
diff# Uncomment the next line to define a global platform for your project # platform :ios, '9.0' target 'PDFViewer' do # Comment the next line if you don't want to use dynamic frameworks use_frameworks! + pod 'ComPDFKit', :git => 'https://github.com/ComPDFKit/compdfkit-pdf-sdk-ios-swift.git', :tag => '2.4.3' # Pods for PDFViewer endRun
pod installand wait for CocoaPods to download ComPDFKit.Open your application’s newly created workspace (
PDFViewer.xcworkspace) in Xcode.
Adding the ComPDFKit Swift Package Manager Dependency
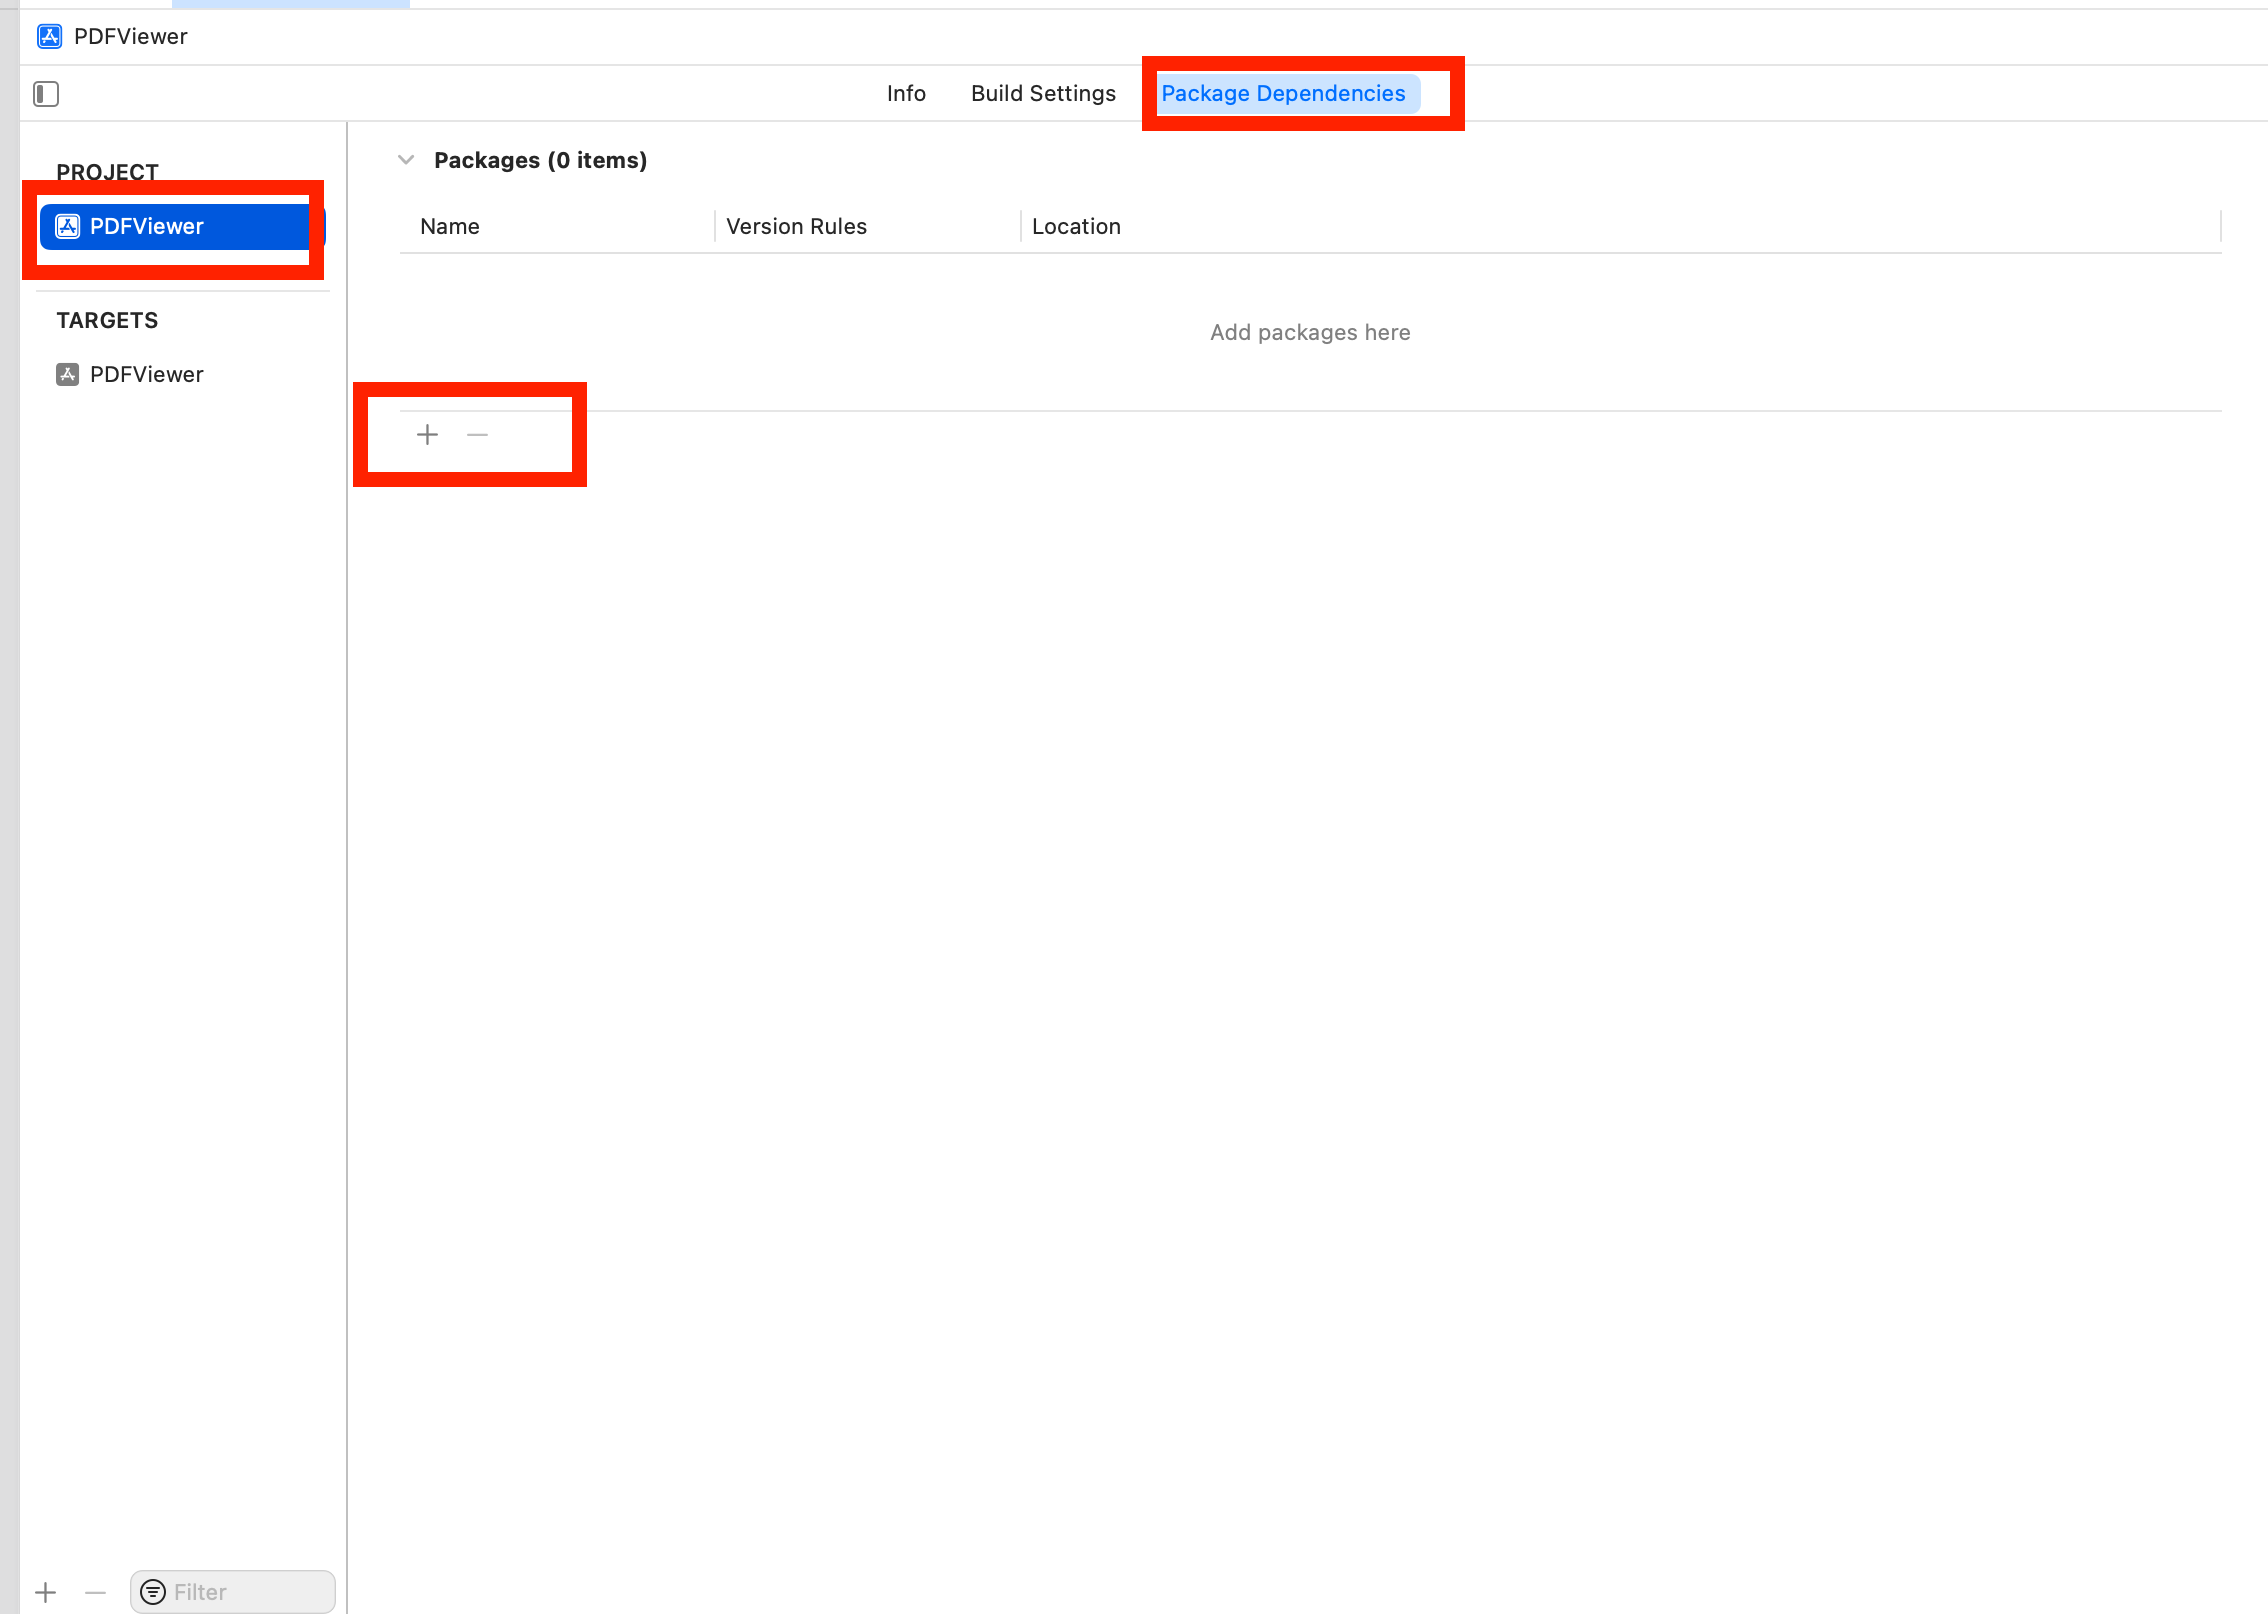
1.Open your application in Xcode and select your project’s Package Dependencies tab.

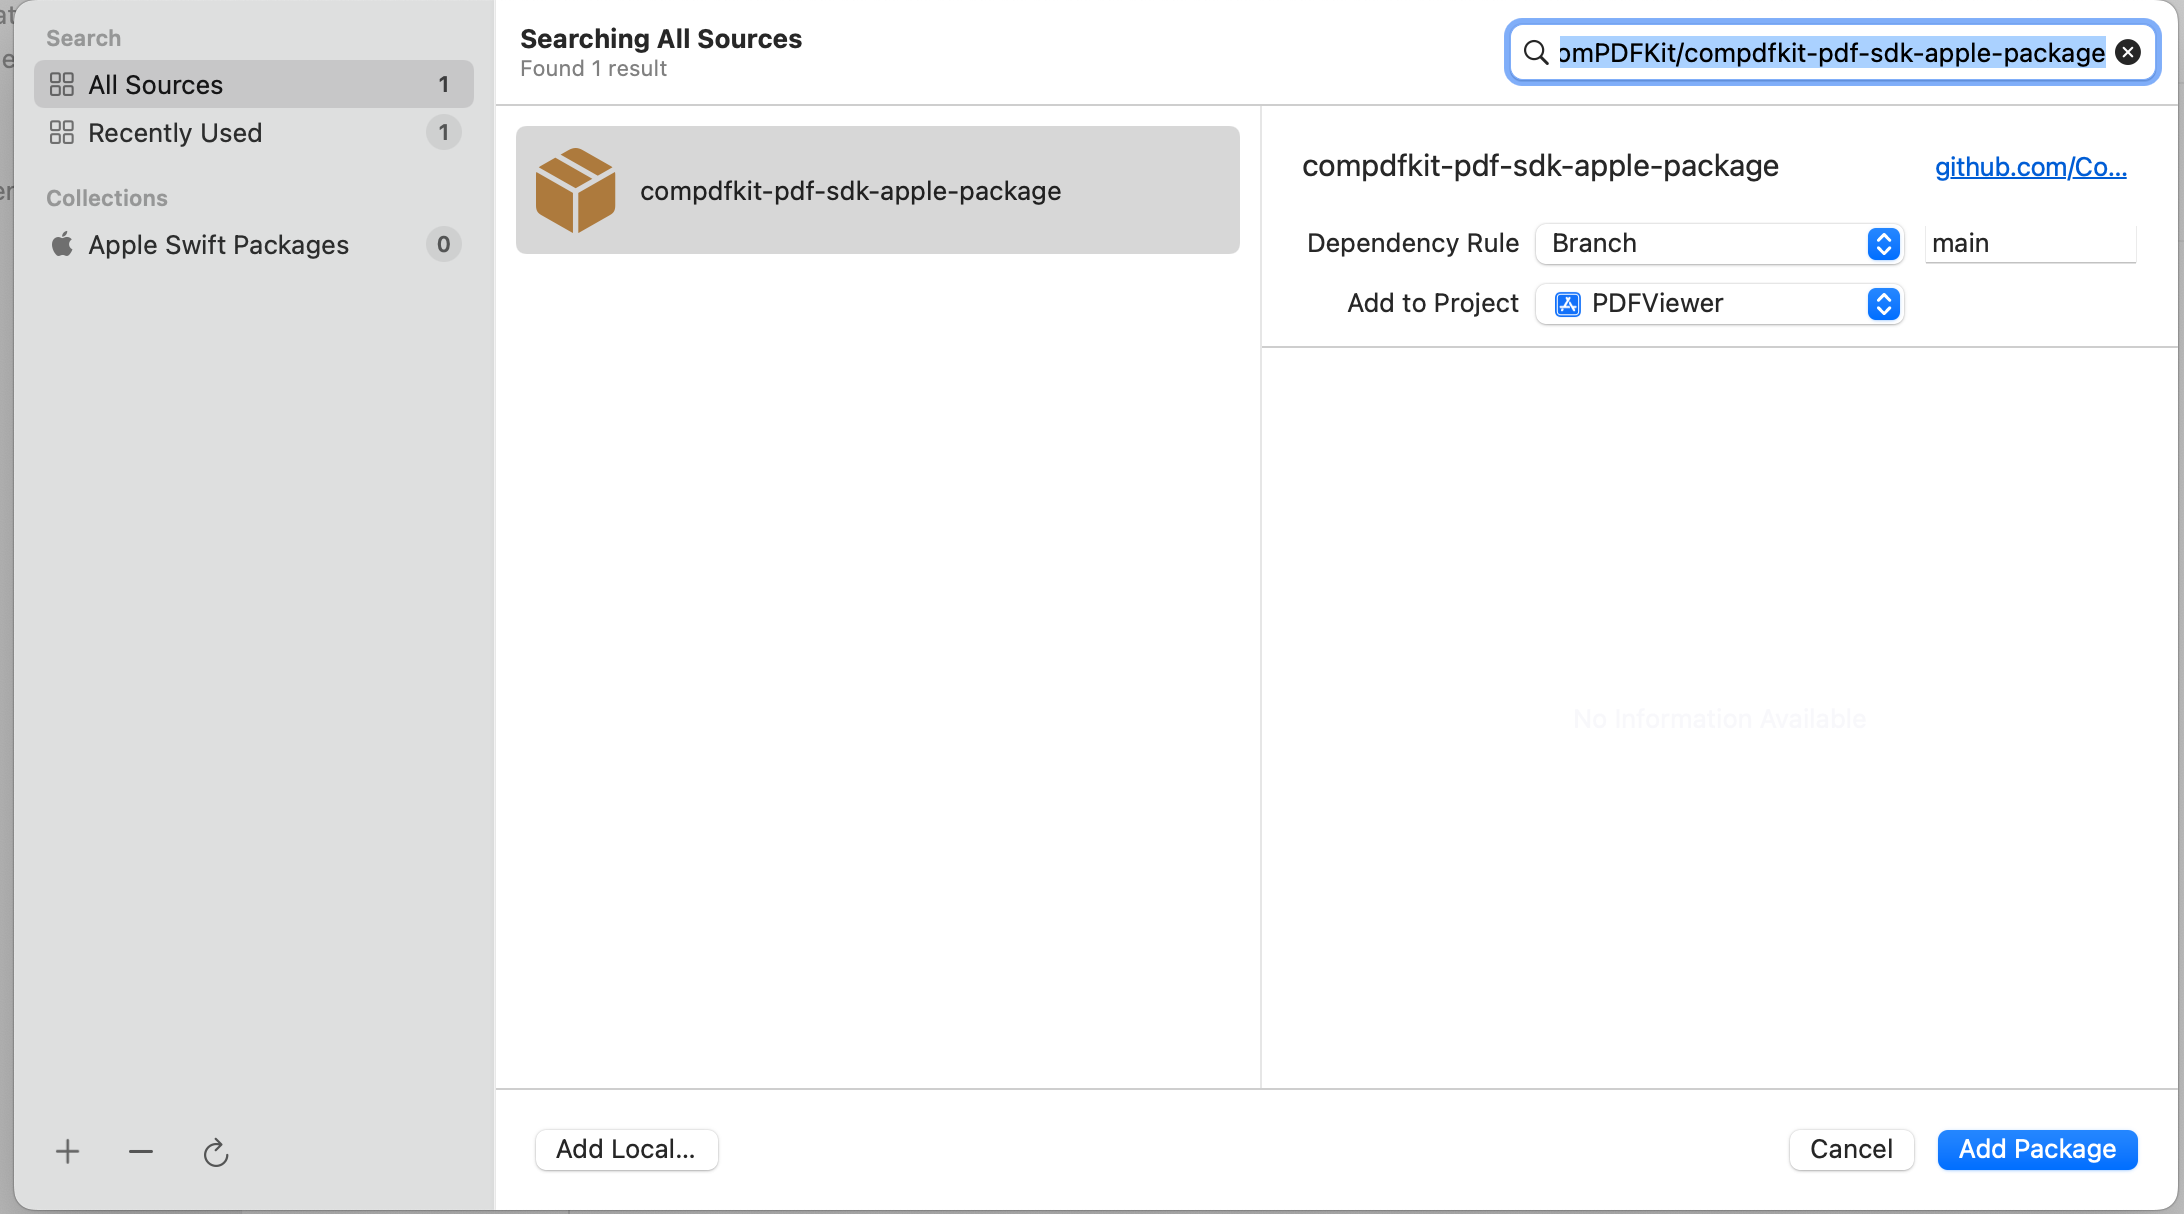
2.Copy the ComPDFKit Swift package repository URL into the search field:
https://github.com/ComPDFKit/compdfkit-pdf-sdk-apple-package3.In the Dependency Rule fields, select Branch > master, and then click Add Package.

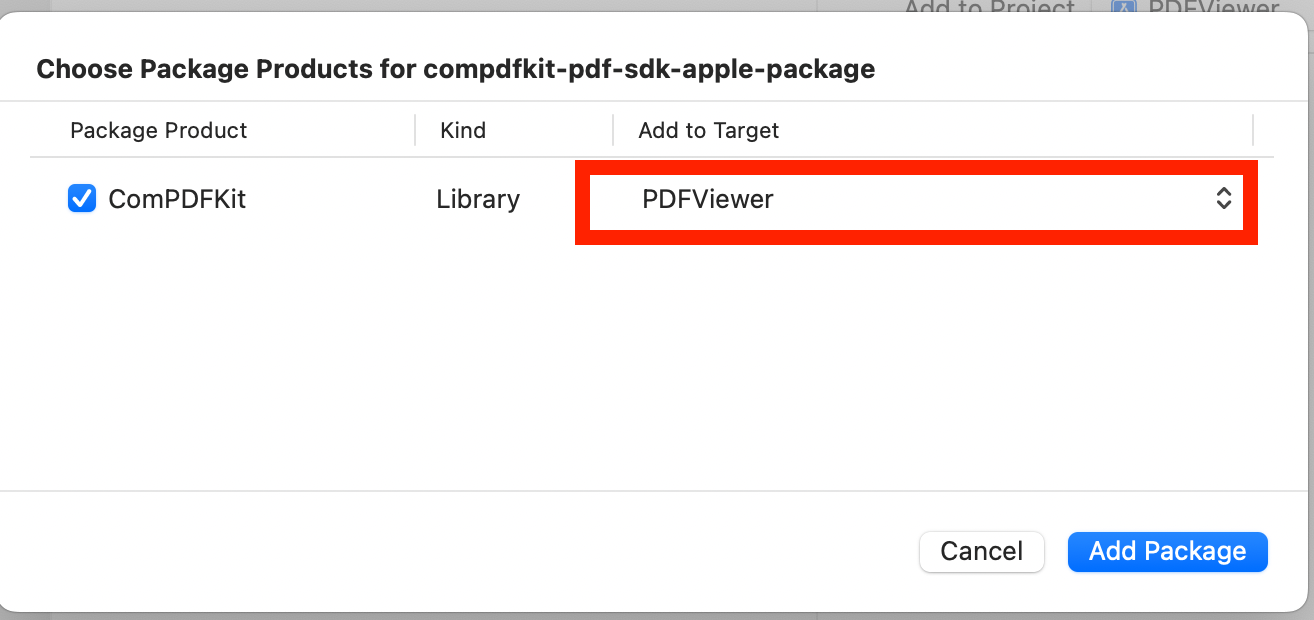
4.After the package download completes, select Add Package.

ComPDFKit should now be listed under Swift Package Dependencies in the Xcode Project navigator.
Adding the ComPDFKit XCFrameworks Manually
Right-click the "PDFViewer" project, select Add Files to "PDFViewer"....

Find and choose "ComPDFKit.xcframework" in the download package, and then click Add.
Note: Make sure to check the Copy items if needed option.

Then, the "PDFViewer" project will look like the following picture.

Add the dynamic xcframework "ComPDFKit.xcframework" to the Xcode’s Embedded Binaries. Left-click the project, find Embedded Binaries in the General tab, and choose Embed & Sign.

For earlier versions of Xcode (like Xcode 13), the Bitcode option might be turned on by default, which requires it to be turned off to run. The precise step to do this are illustrated as shown in the picture below.

Swift Compatibility
To use the ComPDFKit Objective-C Framework in your Swift project, you have to create a Swift Bridging Header file in that project. The best way is to create the .h file manually.
The First Method
First, add a header file to your project with the name: "MyProjectName-Bridging-Header.h". This will be the single header file where you import any Objective-C code that you need your Swift code to access.
Then, find Swift Compiler - Code Generation section in your project build settings. Add the path to your bridging header file next to Objective-C Bridging Header from the project root folder. It should be "MyProject/MyProject-Bridging-Header.h".
The Second Method:
Import modules. Find the "ComPDFKit.xcframework" folder -> "ios-arm64_armv7" -> "ComPDFKit.framework" -> "Modules". Then, import the "Modules" folder entirely or just import the "Module“ files within the ”Modules“ folder. See the picture below for the details.

The subsequent operations can be configured in the same way as the configuration method of Objective-C.
Apply the License Key
Please refer to section Applying the License Key for detailed steps.
Display a PDF Document
So far, we have added "ComPDFKit.xcframework" to the "PDFViewer" project, and finished the initialization of the ComPDFKit PDF SDK. Now, let’s start building a simple PDF viewer with just a few lines of code.
Prepare a test PDF file, drag and drop it into the newly created PDFView project. By this way, you can load and preview the local PDF document using
NSBundle. The following image shows an example of importing a PDF document named “Online5” into the project.
Create a
CPDFDocumentobject through NSURL, and create aCPDFViewto display it. The following code shows how to load PDF data using a local PDF path and display it byCPDFView.swiftguard let filePath = Bundle.main.path(forResource: "Online5", ofType: "pdf") else { return } let url = URL(fileURLWithPath: filePath) let document = CPDFDocument(url: url) let rect = self.view.bounds let pdfView = CPDFView(frame: self.view.bounds) pdfView.autoresizingMask = [.flexibleWidth, .flexibleHeight] pdfView.document = documentAdd the created
CPDFViewto the view of the current controller. The sample code shows below.swiftself.view.addSubview(pdfView)The code shown here is a collection of the steps mentioned above:
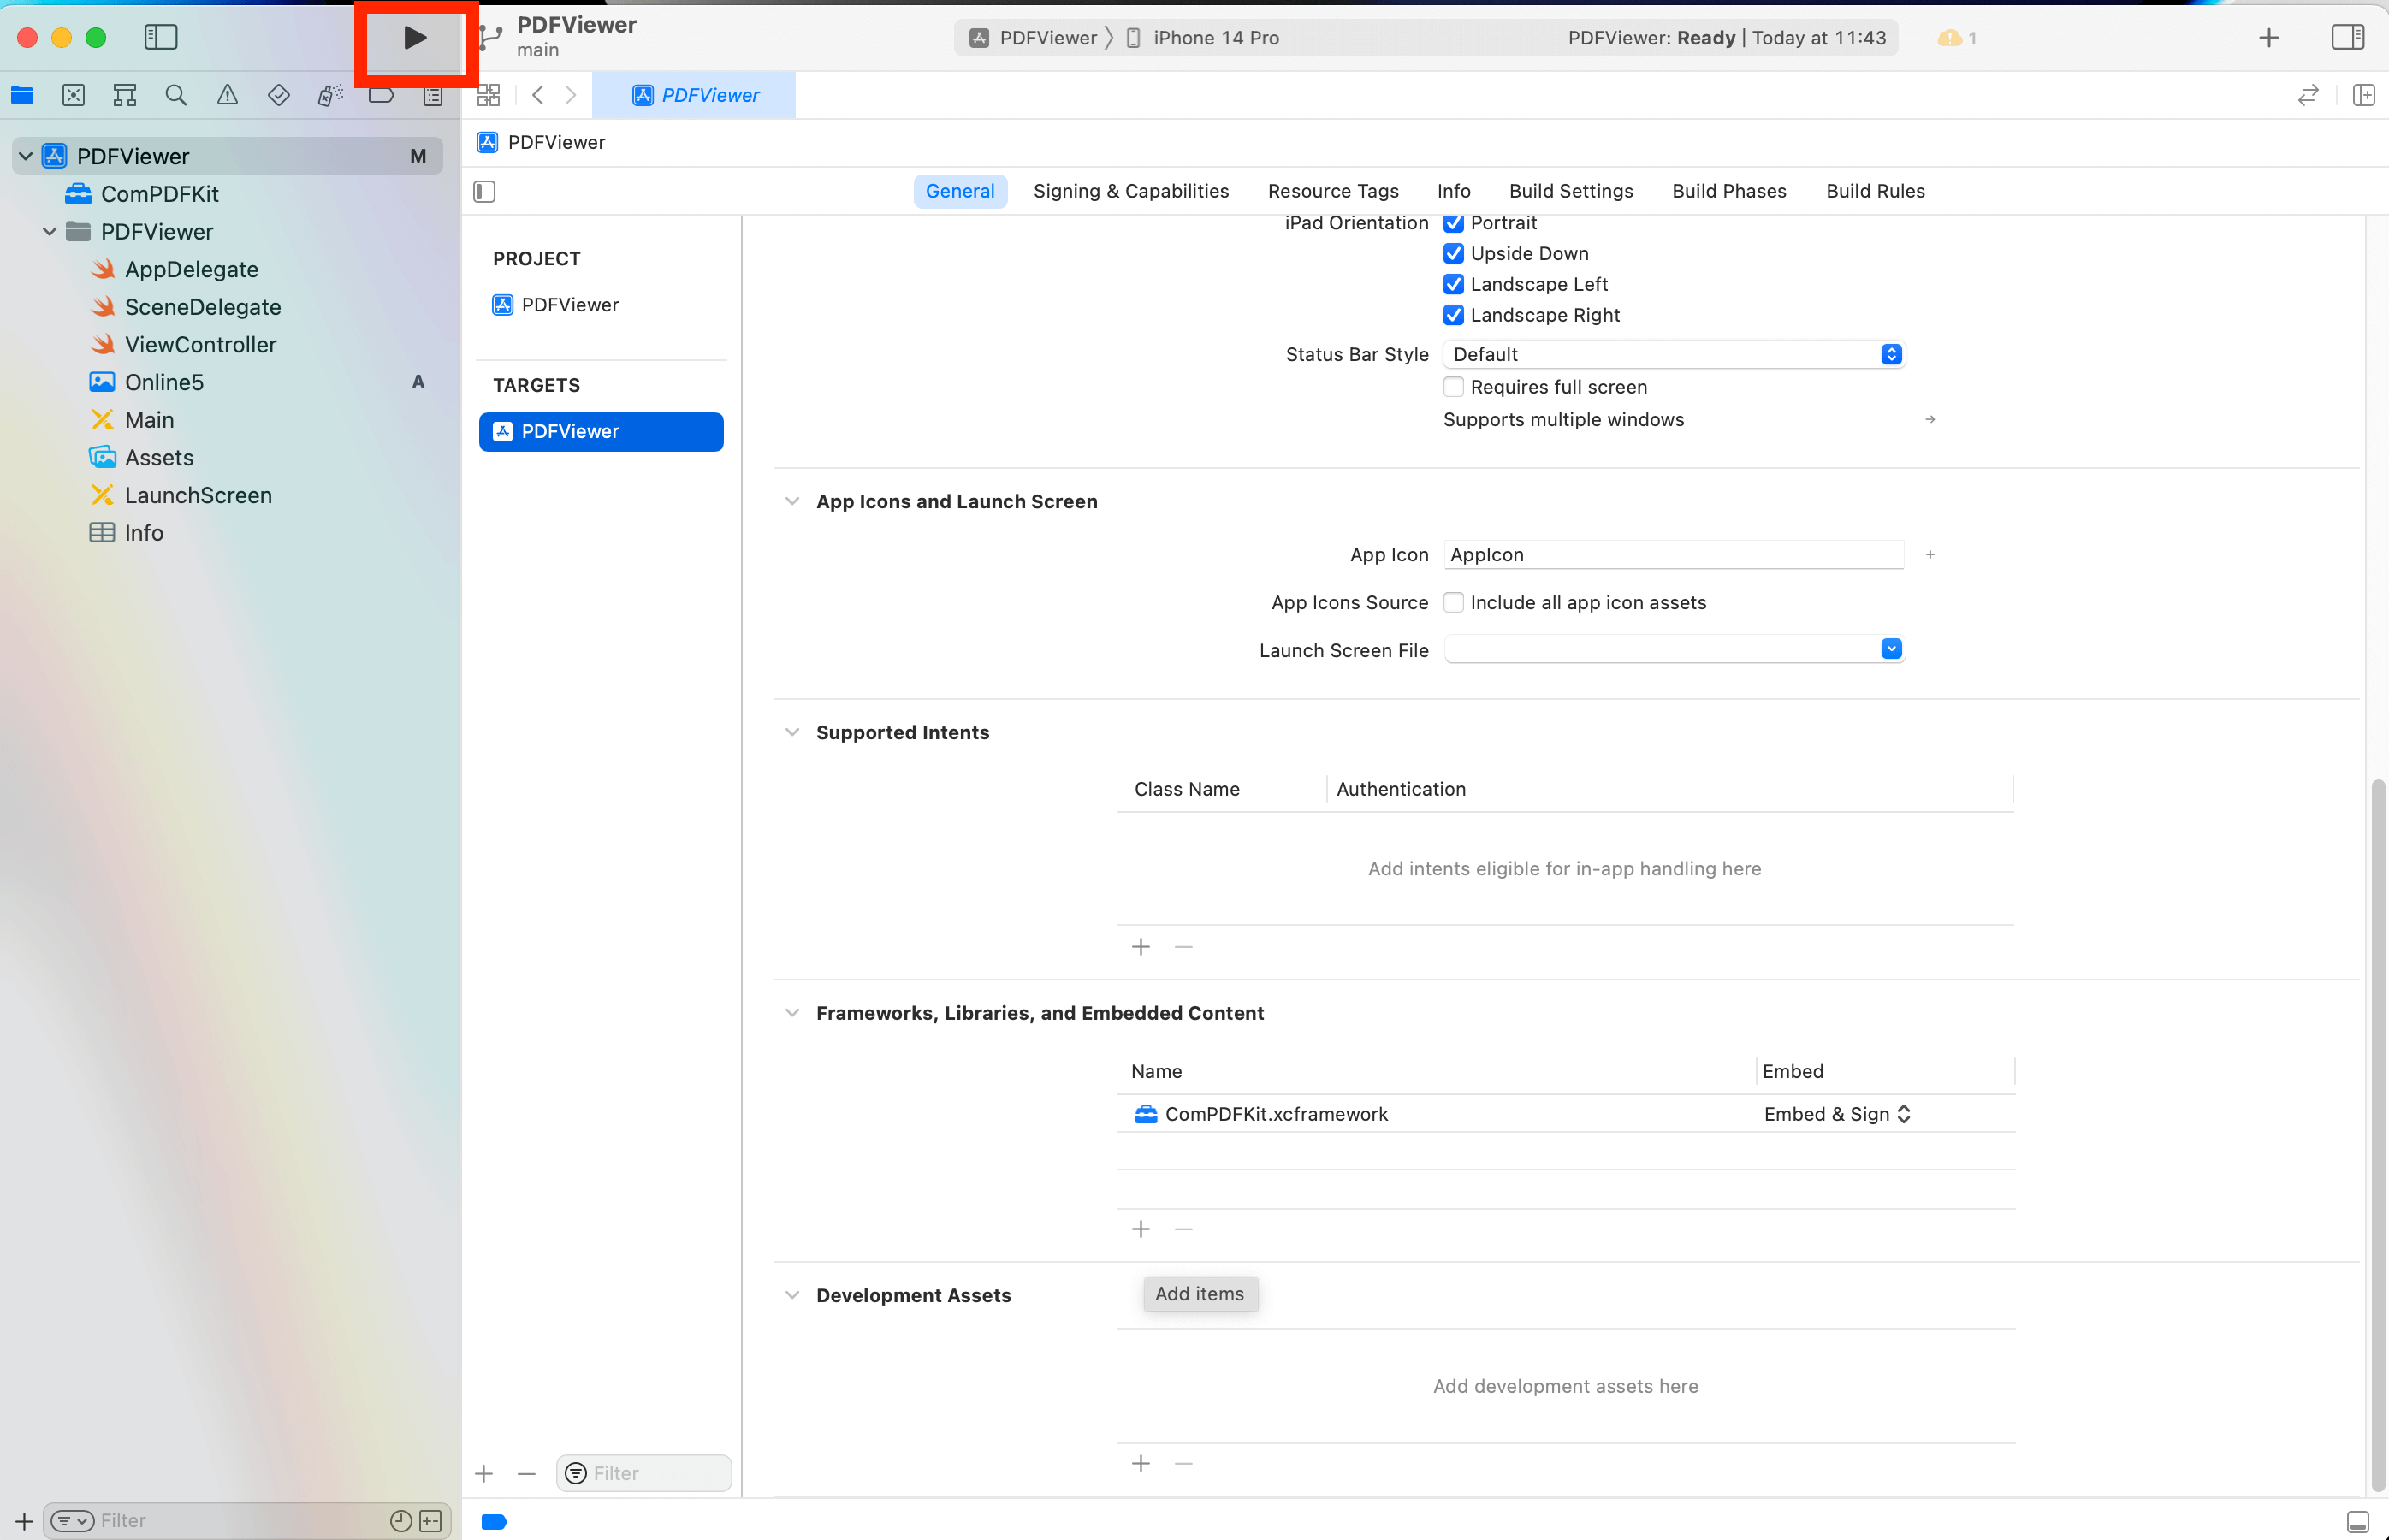
swiftoverride func viewWillAppear(_ animated: Bool) { super.viewWillAppear(animated) guard let filePath = Bundle.main.path(forResource: "Online5", ofType: "pdf") else { return } let url = URL(fileURLWithPath: filePath) let document = CPDFDocument(url: url) let rect = self.view.bounds let pdfView = CPDFView(frame: self.view.bounds) pdfView.autoresizingMask = [.flexibleWidth, .flexibleHeight] pdfView.document = document self.view.addSubview(pdfView) }Connect your device or simulator, and use shortcut Command_R to run the App. The PDF file will be opened and displayed.

Troubleshooting
Bitcode
Even when all configurations are correct, there may still be compilation errors. First, check if bitcode is disabled. In earlier versions of Xcode (such as Xcode 13), the Bitcode option may be enabled by default. It needs to be set to No in order to run the app.
License
If a License setting error occurs, ensure that the Identity (Bundle ID) setting in General matches the Bundle ID you provided when contacting us for the license. If an expired License message appears, please contact the ComPDFKit team to obtain the latest License and Key.
Cannot Run on i386 Architecture Simulator
The version of Xcode 12.5 or newer, doesn't support i386 simulators. Apple dropped the i386 after switching to ARM processors and no longer maintains i386 architecture simulators. Please use ARM simulators or x86_64 architecture simulators to test and develop your program.
So you need to search for Excluded Architectures in Build Settings in TARGETS, and then double-click it. A pop-up window will be popped up, click the plus sign (as shown below) to add i386.

No PDF Displayed
Check if the special encoding is required in the path we passed in, or if the local path we passed in exists.
Other Problems
If you meet some other problems when integrating our ComPDFKit PDF SDK for iOS, feel free to contact ComPDFKit team.