How to Make a Nuxt.js App With ComPDFKit for Web
Prerequisites
To get started, you'll need:
- The latest stable version of Node.js.
- A package manager compatible with npm.
- Apply the License Key: Contact ComPDFKit's sales team to get a free 30-day license to test the project.
Create a New Project
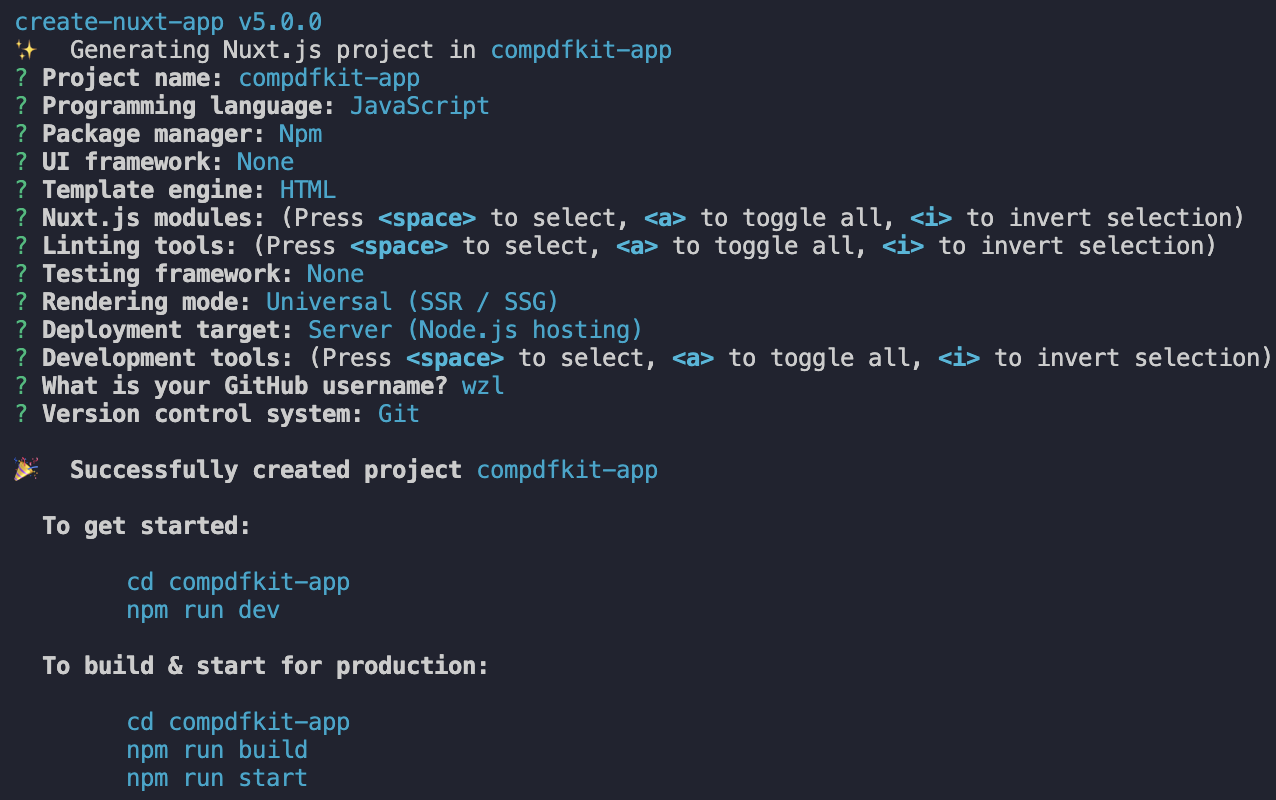
- Create a new Nuxt.js project with create-nuxt-app:
npm init nuxt-app compdfkit-appThis will ask you some questions. Choose the default options by pressing Enter. Once you answer all the questions, it’ll install the dependencies and create a new Nuxt.js project.
Change your directory to compdfkit-app:
cd compdfkit-appAdd ComPDFKit for Web
- Install webviewer as a dependency with npm:
npm i @compdfkit_pdf_sdk/webviewer --save- Add the "webviewer" folder that contains the required static resource files to run the ComPDFKit Web demo, to your project’s static resource folder.The folder you need to copy is
node_modules/@compdfkit_pdf_sdk/webviewer/dist.
cp -a ./node_modules/@compdfkit_pdf_sdk/webviewer/dist/. ./static/webviewerDisplay a PDF
Add the PDF document you want to display to the
static/webviewer/exampledirectory. You can use our demo document as an example.When using the Web SDK, you need to use the
pathparameter to tell it where the copied static resources are located, if not, they will be relative to the current path.
components/WebViewer.vue —— Create a new component called WebViewer.vue under /components.
<template>
  <div id='webviewer' ref='viewer'></div>
</template>

<script>
import { ref, onMounted } from 'vue'
import WebViewer from '@compdfkit_pdf_sdk/webviewer'

export default {
  name: 'WebViewer',

  setup() {
    const viewer = ref(null)
    let docViewer = null

    onMounted(() => {
      WebViewer.init({
        path: '/',
        pdfUrl: './example/developer_guide_web.pdf',
        license: '<Input your license here>'
      }, viewer.value).then((instance) => {
        docViewer = instance.docViewer

        docViewer.addEvent('documentloaded', async () => {
          console.log('document loaded')
        })
      })
    })

    return {
      viewer,
      docViewer
    }
  }
}
</script>

<style>
#webviewer {
  height: 100vh;
  overflow: hidden;
}
</style>When WebViewer is initialized, it returns an instance of WebViewer that can be used to call a number of useful APIs for document creation, manipulation, annotation, collaboration, and more.
Learn more about WebViewer’s comprehensive functionality by diving into the documentation.
Lastly, the style section helps us apply custom CSS like width and height on the viewer’s div element, which WebViewer gets mounted on.
pages/index.vue—— Here we can drop in our newly created WebViewer component.
- Add the WebViewer component inside the template section.
- Import and declare the WebViewer component in the export statement inside the script section.
- Customize WebViewer styles inside the style section.
<template>
  <WebViewer />
</template>

<script>
import WebViewer from '../components/WebViewer.vue'
export default {
  name: 'app',
  components: {
    WebViewer
  }
}
</script>

<style>
html,
body {
  margin: 0;
}
</style>- Start the app and open it in your default browser:
npm run dev